Author: Darrell Ogden
Category: Pet Fence
Brand: Pet Stop
How to Adjust the Signal Field (OT300 & OT200 Transmitters)
This guide explains how to adjust the signal field on Pet Stop OT300 and OT200 transmitters. Proper signal field adjustment ensures your dog receives a clear warning at the correct distance from the boundary wire — creating a safe, consistent containment area.
Find more answers to your questions at our Pet Fence Canada Help Desk.
UNDERSTANDING THE SIGNAL FIELD
For both the OT200 and OT300, the number displayed on the transmitter represents the signal field setting — the distance your dog must stay from the wire — not the correction level.
How it works
This setting creates a signal field on both sides of the buried wire.
For example, a setting of “10” generally indicates a total field width of 10 feet, meaning:
- 5 feet inside the boundary
- 5 feet outside the boundary
Goal
The receiver collar should typically activate between 4 and 6 feet away from the wire.
INSTRUCTIONS FOR THE OT300 TRANSMITTER
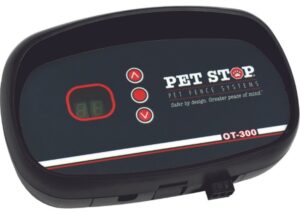
The OT300 uses a dedicated programming mode to adjust the signal field.
- Enter programming mode
Push and hold the center button for approximately three seconds. - Verify programming mode
Release the button when you see two small dots appear next to the digits.
This confirms the unit is ready for adjustment. - Adjust the signal field
Dial the number up or down to your desired setting (for example, from 10 to 12). - Save and exit
While in programming mode, the system is not actively containing your pet.
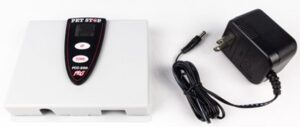
To save the setting and restart the system:- Wait for the unit to time out automatically, or
- Quick method: Unplug the power and plug it back in
The unit has power-loss memory and will recall the new setting immediately.
INSTRUCTIONS FOR THE OT200 TRANSMITTER
The OT200 allows for direct adjustment without entering a programming mode.
- Identify the current setting
The average signal field setting is usually between 8 and 15. - Adjust the signal field
Press the up or down arrows on the face of the transmitter:- Increase the number to push your dog further away from the wire
- Decrease the number to allow your dog closer to the wire
HOW TO TEST AND VERIFY YOUR SIGNAL FIELD
After adjusting either transmitter, you must confirm the actual distance in the yard.
- Locate the wire
Find a spot where the wire location is known, such as where it crosses a driveway. - Position the collar correctly
Hold the receiver collar approximately one foot off the ground, or at your dog’s specific neck height.
Do not hold it up to your ear or high in the air. - Approach the boundary
Start about 10 feet away and slowly walk toward the wire.
Stop immediately when you hear the beep. - Measure the distance
The collar should activate between 4 and 6 feet from the wire.
Repeat this process several times to confirm consistency.
FINAL NOTES
- Signal field size affects where your dog receives the warning, not how strong the correction is
- Always test changes physically in the yard
- Small adjustments can make a big difference in consistency and training success
If your signal field feels inconsistent or your dog is reacting too close or too far from the boundary, we’re here to help.